0:00 – Content summary
Narrator (off screen):
In this tutorial we are going to show you how to design a custom patch using free templates made by Sienna Pacific, that anyone can easily download from our website.
We will be working on adobe illustrator,, starting from a logo in .jpeg or png format, and we Will learn how to vectorize it or how to trace it.
Later on, we will see the template options, we will choose a particular shape, place and align the vector image. We will learn how to change colors according to our brand colors, how to convert text to curves, and finally how to export the design and how to submit it for a free quote on siennapacific.com.
- 0:00 – Content summary
- 0:45 – Intro
- 1:45 – How to download our Free Patch Design Templates
- 2:24 – Opening the template in PDF with illustrator
- 2:54 – Unblocking layers
- 3:18 – Choosing the right Patch Design Template for your project
- 5:34 – Warning about the use of some elements as the base layer and the sewing channel
- 5:56 – Taking the chosen patch template to a new project.
- 7:22 – How to trace an image in illustrator. (Image to vectors)
- 10:21 – How to edit the text placeholders
- 11:01 – Using the eyedropper tool to copy colors from your logo
- 12:08 – Changing the size of your patch template with the transform tool
- 13:02 – How to outline text before exporting
- 13:30 – Saving two copies: one in illustrator and another as .svg
- 14:33 – How to request a free quote for your Custom Patches with Sienna Pacific
- 16:42 – Closing
0:45 – Intro
INTRO
Hi guys! This is Daniel from Sienna Pacific and I’m very excited today because we are giving away something very valuable for any person looking to make patches which is our Patch Design Template.
Today we will go through all the process of designing and making a one of a kind patch from 0 to 100%. So if you have no experience with any vector design program I guarantee you that by following our step by step process you will be able to come-out with a really decent design.
In Sienna Pacific we offer graphic design services. So If you don’t want to invest time in learning this you can always count with us and let Sienna Pacific’s professional graphic designers do this for you.
And that being said…Let’s Get Started!Well without further delay…Let’s Get Started!
1:45 – How to download our Free Patch Design Templates
Let’s start by downloading the template. Just go through the link that we left in the description and it will take you to this page where you can download the template document which is a pdf with vector images, as you can see. You can save it here. But I have it already in this folder.
Now, In order to be able to edit this document we will need to have a vector editor program already installed in our computer. These can be Adobe illustrator, Corel Draw òr Inkscape just to name a few. This last one Inkscape is free but you won’t be able to edit the curved text of our template although as all softwares it is easy to get familiar with the interface once you start working with it. However In this video tutorial we will show you how to edit our template using Adobe Illustrator.
2:24 – Opening the template in PDF with illustrator
So open the template with illustrator
2:54 – Unblocking layers
Unblock layers. Once you open the document you will notice that you cannot click on any element and this can be frustrating but it is made for safety and you just have to go and open the layers window and unblock them all.
3:18 – Choosing the right Patch Design Template for your project
Then go and choose the template shape that is more suitable for your project. For instance, if I have a round logo I can use one of these first round patch templates, as you can see you can edit the text on these rockets, but we do not recommend to start working here but to select and copy the one you choose to another document as we are going to do very soon. Ok let’s see what else we have here. Then we give you six types of square patches template. If my logo or design is horizontal maybe it will be a better choice to choose this second group of patch templates. These are also good for 1 inch square ranger eye patches or for pvc labels as well.
Then in the next page we have a third group of patch templates, that includes six type of shield shaped patches ideal for police badges or law enforcement badges such as sheriff, rangers, fire departments, EMS companies or private security services.
And, in the following page we have six other types of patches, these ones all have in common their tombstone shape ideal for shoulder patches to identify law enforcement or even for military shoulder patches of any military corps such as marine, navy, coast guard, air force or space force.
And last but not least we have the wedge shaped patch designs that are typically used not only for sports teams but also for park rangers, boy scouts, and to identify personnel who work at national parks and they are also suitable for the military, police and law enforcement.
As you can see this is all what our free patch design templates include so far, you have plenty of options to choose from and if you have any doubt here at the bottom of the page you can find our contact information, you can either send us an email or call us directly to ask for more information.
5:34 – Warning about the use of some elements as the base layer and the sewing channel
Each patch template includes the black background which is the base layer and the sewing channel. We do not recommend messing with these elements. You can change size but always group all the elements first prior to enlarging or shrinking the patch template to adjust it to a certain size you want.
But as we said before, do not edit the template here.
5:56 – Taking the chosen patch template to a new project.
Ok. you already know what your options are and you have to choose one. For this first example we are going to choose the first one. We have to be sure we are using the selection tool. Draw a square around the template you choose, group it with cntrl g , then copy it with cntrl c, go to file, open a new document, select a document format, we are going to choose an A4 sized canvas and we are good to go. Once we have created our new document we can paste our template and we will center it using our align toolbar.
7:22 – How to trace an image in illustrator. (Image to vectors)
Ok now we are going to open the folder where we have our logo or the image we want to print or reproduce on our patch. This can be a jpeg or png, in the case you dont have the vector file of your logo or artwork, if you do have it please skip all the following part where we are going to explain how to vectorize your logo using adobe illustrator.
Otherwise if you do not count with your art design or logo vectorized please stay with me because I am going to show you how to transform it into vectors.
Otherwise, if you do not count with your art design or logo vectorized please stay with me because I am going to show you how to transform it into vectors.
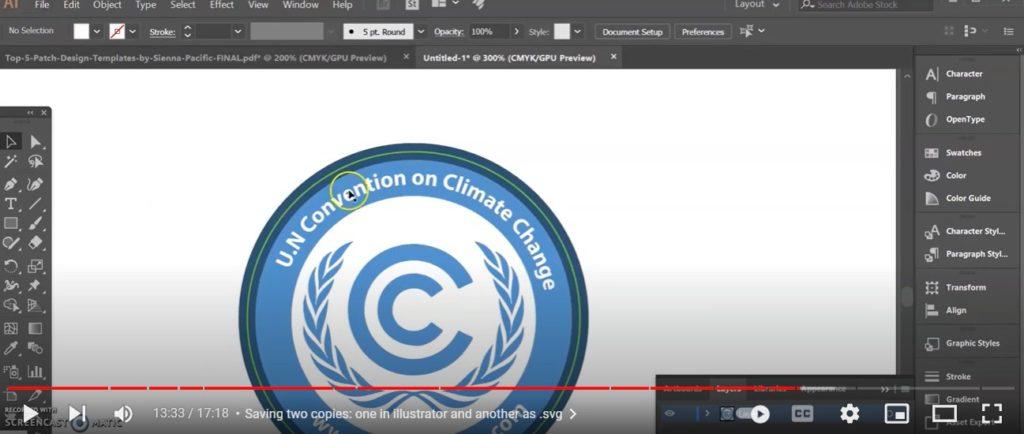
Select your image, drag it and drop it into your illustrator project. For this example we are going to use a United Nations Climate Change logo which is in the public domain and we think it will look nice framed in this round patch template we chose. Well drag and drop it, once there select it with the selection tool, shortcut letter v on your keyword. Select the raster image you just imported and press image trace in this top tool bar menu or panel you will see when the image is selected.
Depending on the type of logo or image you have you will need to choose a different tracing mode. If it is a logo it usually won’t have more than 16 colors. Most of the time a 3 colors or 6 colors tracing mode will be enough for logos.
Wait a little, and once the process is done you have to press the expand button in order to convert tracing objects into paths.
Afterwards if your image is a png image with alpha background or invisible background you might be ready to go, but it is most likely that your image be a jpg and have some kind of background, whether white, black or of any other color. If this is your case you will have to ungroup it, keyboard shortcut ctrl U, select the background and delete it.
The most of the times, like in our case, you will have to clean up your vector art after deleting the background, zoom in to check out for little undesired vectors in order to remove them all. And in the case your traced image has too many vectors you will have to simplify it.
Then with the selection tool select drag you mouse to draw a square around your logo, group it and you can either copy paste it or drag it to the place where you want it to be. You can also use the align tools to take it directly to the center of your canvas. Ok now you have your logo or artwork in vectors placed inside our patch design template and maybe you will want to make some other changes like adding some text.
10:21 – How to edit the text placeholders
Double click on the text element to edit them or click on them with the text tool. There you can write whatever you want. It could be the name of your company or organization, a quote, whatever. For this example we are going to write U.N Convention on Climate Change. We can adjust the size, color or font using the options in the object type panel. Let-s edit the other one, on the bottom of the design. It can be yourwebsite.com or any other thing that better suits your patch project.
11:01 – Using the eyedropper tool to copy colors from your logo
Later you may need to change the color of your background. For this we recommend you to use the eyedropper tool with which you will be able to easily copy a certain color to another element. To use it first select the element you want to change the color, in our case it will be our background, then We can choose this tool selecting it from the tool panel or call it using the keyboard shortcut letter i., once using the eyedropper tool pick a color from you logo or design and the color of the element you selected will automatically change. If you want a darker blue for instance you can go to the color tool and drag it to the dark side. This way you will be using a color in the same gamma of your logo’s color scheme.
12:08 – Changing the size of your patch template with the transform tool
What else? We can also adjust the size of our patch. For this with the selection tool drag again the pointer to draw a square around your patch template. Cntrl G to group it and then adjust size whether dragging down or up the group, or by using the options in the transform tool window.
If the units format is in points and you want to set it to inches for instance you will need change the setting by going to the main menu, edit, preferences, units and change units to inches.
13:02 – How to outline text before exporting
Well there you have a very decent patch design ready to be sent to request a quote using our inbuilt webform. Lets do it.
But first , before exporting it we need to transform our text to curves. This is specially necessary if you are using a special font that you have installed. Because if you dont transform your text to curves and we doesnt have that type of font installed we will lose the format. To convert text to curves select your text element, then press right click on it and select the option create outlines, you can also call this function using the shortcut Shift +cntrl +O If you have a lot of text and want to transform all of them at once, You can alternatively go to select in the main menu, then object, then Select All text objects and then go to object in the main menu, path, outline stroke.
13:30 – Saving two copies: one in illustrator and another as .svg
Once this is done you will have to save the document press, cntrl s. You can save it as an illustrator project but also as an svg project, or pdf with editable mode. We recommend you to save a copy for you in illustrator and then save it again in .svg or pdf format for requesting a quote.
Lets do it.
14:33 – How to request a free quote for your Custom Patches with Sienna Pacific
Now we have the two documents with our patch design ready to be uploaded. To request a free quote with Sienna Pacific go to siennapacific.com. Navigate to the custom patches page in the main menu and press request a free quote or scroll down in the page until you find it. Once here fill out the quote form with your personal information. Name, your email, select a patch style we offer soft rubber pvc patches, embroidered, woven or leather patches, choose the amount of patches you want, our min. your quantity is 100 pieces only. Input your phone number, this is mandatory. Input your patch size , the width and height. Choose the country where you are located. If you are choosing a fabric patch such as embroidered or woven you can choose between two different kind of borders, merrow border and laser cut. Then you have to choose a backing for your patch. Iron on is not available for PVC Patches, for these type of patches you can choose between hook and loop or plain backing, On the other hand if you are choosing a embroidered or woven patch you can choose iron on, hook and loop, peel and stick or plain backing.Right below we can choose how fast we need our patches. And finally here we will be able to upload our patch design. Lets do that. And last but not least we have a field to write down any kind of additional information you might think it is necessary for us to better understand your order or what you are looking for specifically.Press the big button that says Price my patches and you will be ready. We will get back to you by email in less than 24 hours with your quote ready for you to take a final decision or to compare prices.
16:42 – Closing
Well this is it guys. In the next videos we will be experimenting with other templates, the square ones, the shield shaped, and so on. We hope this was helpful and if you like it, you know follow us, give us a like, or activate the notifications bell for be updated with our latest videos. This was Daniel from Sienna Pacific Custom Products Made easy.-
Related Posts

How to Attach Patches to Almost Anything
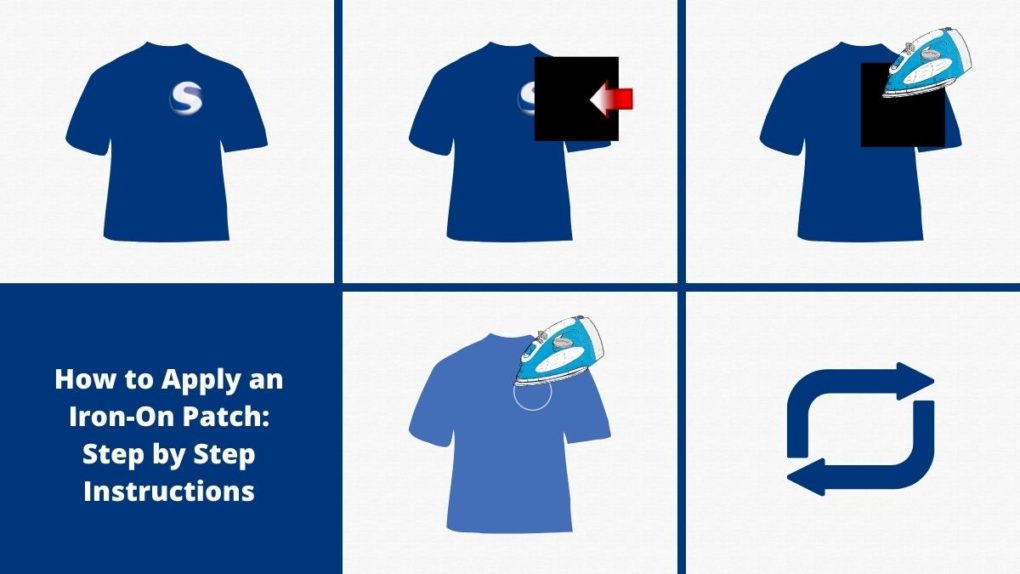
How to Apply an Iron On Patch: Step by Step Instructions
How to remove Iron on Patches
Related Products

Learn more about How to attach patches!