This Beginner’s Guide to Clothing Label Design is full of insights and tips for small business owners, designers and anyone else looking to design, create and order the best clothing labels for their product line.
Here you will find information from learning about the types of labels, selecting the right label for your product, all the details you need to consider when designing your label and placement and location of labels for common products.

- 1. Types of Clothing Labels
- 2. The Size of Your Labels
- 3. Clothing Labels Folds
- 4. How Attach Your Labels to Clothing
- 5. Choosing The Right Colors for your Clothing Labels
- 6. Fonts for Clothing Brands
- 7. Clothing Label Design Tips
- 8. Designing You label
- Our Production Process – From Start To Finish
- Let's Get Started
- Request Samples
1. Types of Clothing Labels
Regarding the type of material and technique custom labels can be made out of, there are three options available: woven, printed or PVC, which we will described in brief right on.
Woven labels
This is the preferred type of label ever, no discussion on that. However, there are certain types of custom woven labels: among them we offer Woven Damask Labels as the most popular option, which satin threads and softness allow high quality and professional look. Then you have Taffeta labels, made out of polyester at a lower cost.
Printed labels
The current state of the art allows to screen or digitally print your logo and message and create custom fabric labels on a number of materials like satin, cotton, polyester, Tyvek®® (a synthetic material made with polyethylene fibers) or high quality card stock in the case of hang tags.
PVC labels
These are labels made out of polyvinyl chloride, also called soft rubber because it is soft and bendable. This material is specially recommended for outdoor gear such as jackets, gloves, bags, camping tends and backpacks, just to name some.
Need more guidance?
Read our article about Choosing the right Label style for your products.
2. The Size of Your Labels
![the size of your labels -one-size-does-not-fit-all-label[1]](https://www.siennapacific.com/cms/files/uploads/48102643-one-size-does-not-fit-all-label1-e1594978076614-244x180.jpg)
What’s the Best Size for Your Label?
Choosing the right label size is crucial when you design your own clothing labels, and it will depend on the placement in your product.
Our custom clothing tags are a 100% made to your needs and we do have common size recommendations.
To Determine your Label Size
-Try with a ruler measure out the width (left to right) x height ( top to bottom).
-Take a piece of paper and sketch out measurements for your label.
-Measure labels on other products you like.
Average Clothing Labels Size
The most common label sizes will depend on the item and placement of said label. The major retailers have certain standards and it is always a good idea to use them just in case you get picked up by them 🙂
3. Clothing Labels Folds
While not all woven and printed labels have a fold, we can add any type of fold to your labels, at no extra cost.
Types of Folded Clothing Labels
Straight cut
(Also called no-fold) straight cut labels are perfect if you are will sew the label all around, or on the sides.
Used mostly in neck labels, iron-on applications, handbags and accessories.
End fold
End fold labels are your best choice if you are sewing the label on the sides.
Used mostly in neck labels and pant labels. We recommend this whenever the label will be placed on the outer side of your product.
They work great for handmade items.
Center fold
Center fold labels will work great for items where the label will be sticking out:
- Flapping as a tab, either on the inside or the outside of your product.
- Logo labels attached to the neck of shirts: neck labels, care labels, hem tags and side labels.
They are also called loop folds.
Miter Fold
A miter fold had two end folds at a 45 degree angle and then upward at a 90 degree angle creating a tab to be sewn into the seam of your product. If you take a look at the examples in our gallery page shown it should help illustrate.
Mitre fold labels are very common on neck labels, forms a sort of hook, which allows you to hang the product.
Manhattan fold
Manhattan fold labels work exceptionally well when you are attaching the labels in outside hems or sleeves. Used Mostly on sleeve tags and hem tags.
Should You Fold Your Labels?
Folds will provide with a smooth, clean edge that will not itch or scratch your customer, making it a little bit less likely for your labels to be removed.
Miter-Fold Labels: How to determine the total length?
The miter fold is a whimsical way to fold your custom fabric tag and display your branded logo on your products. Also referred to as the “hook” label its gets its nickname from using the label to hang its products up. The most common uses for a miter fold label are on collared shirts, robes and/or jackets .
Determining how to create your miter folded label can be tricky if you are not a label guru. Here are some easy tips to follow to help you create the perfect miter fold and let your sales rep know exactly what you want.
- Determine the live area for your logo. This includes the width (left to right) and height (top to bottom; not including the tabs) that your logo will be displayed before the folds.
- Determine the sewing allowance space for the tabs to sew into your product. Generally speaking most common tabs are between 0.25″-0.5″ space but not limited to.
- Once you have determined the live area for your logo and the tab sewing allowance you will then have a general idea of the complete size of your label.
If you want to create your own illustration you can easily take a piece of printer paper with a ruler and cut a strip of paper and mark off the live area and the sewing allowance tabs to give you a visual interpretation of your label as will be.
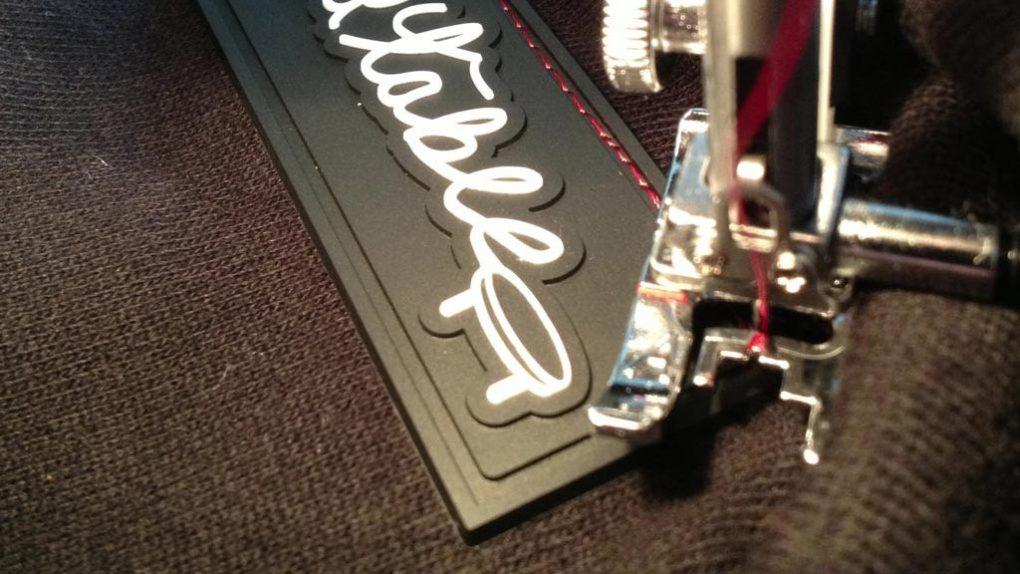
4. How Attach Your Labels to Clothing
There are many ways to attach your personalized fabric labels to any fabric.
Depending on the label placement, you could need the sewing allowance to be on top, top and bottom, on the sides or all around.
Do not to despair!
It is actually a very simple concept, and there is not a one-size-fits-all answer, but simple guidelines.
What is a Sewing Allowance?
Sewing allowance is the distance between the edge of the garment label and the stitching used to attach the label to another piece of fabric.
Do I Really Need To Have One?
If you will be sewing your labels to your products, you WILL need a sewing allowance, after all yo do not want stitching on top of your design!
If on the other hand, you are ordering iron-on clothing labels, then you DO NOT need to have one. However, a little extra “white space” around your label design will help it stand out.
What are The Most Typical Sewing Allowances?
In the “custom clothing label world”, the most common sewing allowance is 1/8″, with 1/4″ and 1/16″ following closely. Rarely we see 1/2″ or 1″ but they do occurred once in a while .
How much sewing allowance do I need?
It is hard to say. The distance you will need to attach your labels or tags will depend on your sewing skills, the position of the label in the product or just your preference. Most of our customers use between ⅛” and ¼”.
What are your Sewing Allowance options?
The decision is yours whether you want your label to be sewn down flat on all four sides of your label or only on two sides.
Two sided sewing allowance is used if you want your label to be loosely stitched, be centered folded into a seam or added end folds to allow depth to your label.
What’s the Best Method To Attach Your Labels?
The best way to attach your label will depend on your abilities and preferences, but the determining factor is the need for your label to be permanent or not.
Sewing labels will always be the best way for those labels that need to be permanently attached to your product.
5. Choosing The Right Colors for your Clothing Labels
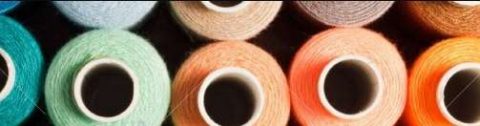
Color evokes positive associations and an initial opinion of your brand.
With a thread chart of over 200+ colors to choose from the decision can become overwhelming.
To help us help you achieve the right color scheme we have posted our thread chart here to review colors and shades.
Keep in mind, colors can be subjective due to pixilation differences from computer to computer but lets you play in active role in guiding us into your design vision.
We are familiar with RGB, CMYK or PMS color charts to match our thread chart up to if you only have those colors to go by in art files.
We will match as close as we can but cannot guarantee 100% match all the time.
Choose creatively & wisely!
What Thread Colors Do We Offer?
In order to make it easier for you, we have matched our most commonly used PMS Colors with the thread colors we have available for your Woven Labels, in our Woven Thread Chart page.
Take a look and let us know your choices!
6. Fonts for Clothing Brands
Best Fonts for Woven, Printed & PVC Labels
Choosing the right font style is key to making an identity for your brand. The right font style causes instant recognition.
New businesses and competitors start every day, therefore you need to have a great logo.
When Choosing your Font Style…
- Bold and simple fonts are recommended, for greatest legibility
- Don’t add too many font styles. 2 font styles max
- Fonts are congruous with your business area of expertise
- Choose a font style that can grow with your business success
- Make sure your font fits the mood
The wrong font style chosen can be confusing and even unrecognizable to other brands.
Other Articles to help you pick the Right Fonts for your labels.
-39 Fonts for logos and how to pick the right one: Your brand’s identity can be defined by your choice of fonts.
-12 Fonts and color schemes used in the logos of the most famous brands
7. Clothing Label Design Tips
-Creating A Winning Label Design
The challenges of creating your own brand start when choosing your “Brand” Name, Colors, Fonts and other design elements. You gotta make sure they match your business style and personality and at the same time it needs to be easy to remember and recognize.
Remember, your logo will be used in many different types of applications that not even you can foresee at this point.
As important as it is for your clothing products to look good and make a statement, it’s as important for your company’s logo to do the same.
The business of fashion is a business of design.
-Quick Tips on How To Create Your Own Logo
Try to look at your designs and sum them up in a single word. Use that word as either your brand name or as a template for your logo’s look.
For example, if your clothes can be described as ‘edgy,’ use fonts and logo designs that have harder edges and angles. Make sure the logo’s design is clean and clearly legible for customers to read and recognize as well.
Following these simple parameters can help you develop a quality logo for your business. For more on fashion business logo development, click here:: 26 Logo Ideas from successful clothing brands .
-Simple vs Intricate Design… Which One is Right?
Your logo could be used in anything from a large banner (for a Trunk Show or Craft Fair Booth) to a tiny stamp or pin, or pen, or button or…you get the point.
A professional graphic designer knows all of this and he or she will be proactive and suggest you to create different versions of said logo.
The right design will work for any application and its manufacturing process: from the common press printer, to engraving, die-struck, embroidered, PVC molded and woven techniques.
Design Your Own Clothing Labels? What To Look For?
The things to look for are size and color of elements.
ie. Your website looks great on your large Vinyl Banner but, will you be able to read it in a neck label? or in a hang tag?
It is better to get all your brand settled before you fall in love with a logo that:
- is not possible to embroider, or to read at a small size
- it has so many colors that there is an increase in cost every time you try to get it made.
Design Specs for Woven Label
- The minimum text font size is minimum 8pt.
- The minimum line thickness possible is 1pt or they will not be possible in production machine.
- Don’t forget to consider how much sewing allowance you will need to include on all sides or just 2 sides to attach the labels in products.
- The most common sewing allowance is 1/8″, with 1/4″ and 1/16″ following closely. Rarely we see 1/2″ or 1″ but they do occurred once in a while.
Color Limitations
- Printed: A logo with more than 4 colors benefit from an Offset Printing Process, vs Screen Printed. $$$$.
- Embroidered: You will be paying more for a logo with more than 6 colors. There is a limit on the amount of colors an embroidery machine can handle at once. $$$.
- Woven: Most manufacturers have a standard price for up to 6 or 8 colors. However, you cannot weave gradients with the standard process, and the other one will increase $$$
8. Designing You label
After reading all about the different options for your apparel labels, you might feel a little overwhelmed about all the decisions you will need to make.
But don’t despair! All of these combinations have been massively used by thousands of customers and there is no need to reinvent the wheel.
Most Popular Combinations
The most important key to design your own clothing labels is to decide if you want your label to be perceived as an established, solid brand, or an innovative one.
COLORS
Around 50% of the labels we make are made in a combination of Black & White. Mostly Black Labels with a White Design.
FOLDS
62% of the labels are made with no folds, 23% of them are center fold and 5% are ends-folded.
- Center Fold Labels will hide the ends, and can be sewn into seams, especially the inside of the neck and on the sides of t-shirts.
- You can also use them as little tabs (also called flags) that stick out of clothing.
- or wrapped around external seams like a bottom hem tag, pocket or sleeve tab.
SIZES
The most common size is 2″x1″ for a no-folds label, 1″x2.5″ for a center-fold label and 2.5″x0.625 for a ends-fold label.
Labels can be as little as 0.5″ or as large as 12″
FONTS
Most of our customers use a combination of serif and non-serif fonts for your text, and only use Cursive fonts for short bold text.
SEWING ALLOWANCE
Most of our customers sew their labels on two sides (top and bottom or left and right) or just at the top of the label for center-fold.
LOGO AND DESIGNS
The best label designs include:
- A simple bold logo,
- highly contrasting colors, such as black and white,
- and website address one the back (center-fold) (for logos that don’t include the name of the brand.)
Don’t forget!
- We will always create a proof/artwork for you to review and approve.
- Once you approve the Art Proof, we will sew out a sample and email you a picture of your approval. The picture will show you what your label will look like.
- After you approve the sample we charge your card in full.
- Production Time is about 10 working days.
- Once the order is ready to ship, we will email you an invoice with the Fedex tracking# on it.
Our Production Process – From Start To Finish
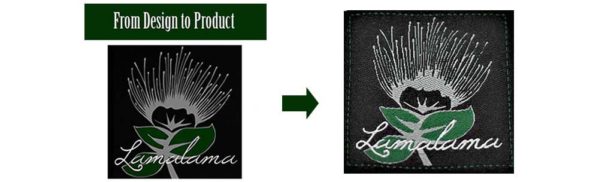
1 Quote Request. Submit your project’s details. Make sure to include your logo, quantity, size needed.
2 Approve. Review & Approve Artwork Proof and Price Quote.
3 Confirm. Billing, Shipping Information & Pre-Production Sample.
4 Order. Final order submitted for production.
Let’s Get Started
Ordering your Custom Clothing Labels is easy, just fill out our simple quote request form, our expert Sales Reps will get back to you within 24 business hours and guide you through every step of the process.